

In our on-going effort to eat healthier
I wanted to get rid of my non-stick cookware
in favor of stainless steel.
My fabulous hubby bought me a set for Christmas.
I Heart Them!
I do not want them to get scratched
so I've been using the cardboard dividers
that came in the box with them.
I was being green by using the cardboard.....right?
Not cute.......nuf said :)
I decided to make some dividers that would match my kitchen
and be so much cuter than the cardboard.
You'll need:
2 - 16" squares of fabric (or fat quarters)
1 - 16" square of batting.
Small co-ordinating scrap for applique
Large dinner plate or platter
Small plate for center circle
Marking pen
Wonder under
Perle cotton floss for applique
It's best that you read through the entire tutorial
before you begin.
First I used a 13" platter.
My largest pan is 12" and this worked perfectly for me.
I traced the platter onto the wrong side of the fabric.

Next I divided the circle into 4 by drawing a line down the center
and then turning the fabric
and drawing another intersecting line.
Now the circle had 4 equal parts.
(this drawing is just so you can see it easier)

I placed the smaller plate in the center of the larger circle
and marked where the straight lines intersected with the smaller circle.
These will be your "stop" and pivot marks.

Next I used a vitamin bottle top to draw rounded corners
at the top of the 4 dividing lines of the larger circle.

Next I stacked my fabrics.
The two fabrics should be right sides together
with the batting underneath.

Beginning at the top edge of the circle,
and sewing through all 3 layers,
I stitched 1/8" inside my marked lines
stopping at the smaller circle and pivoting,
then making 3 - 4 stitches then pivot again
and stitching back up again and continuing on.
Leave a 4" opening for turning.

This is what it will look like when you are done.

Using sharp scissors,
cut along your 4 dividing lines,
being careful not to cut your stitching.
Cut into the corners in a "V" shape.

Trim off excess fabric to 1/4" all the way around.
Turn inside out through your opening.
I use a wooden dowel for this.
I've accidentally cut my fabric when I've used scissors
to push out projects.

Once you have it all nicely pushed out,
press it being sure to press the open edges
to the inside.
Slip stitch the opening.

I did a 1/4" top stitch all the way around.
Those of you who have mad quilting skillz
can go crazy at this point
and quilt this little guy any way you like.

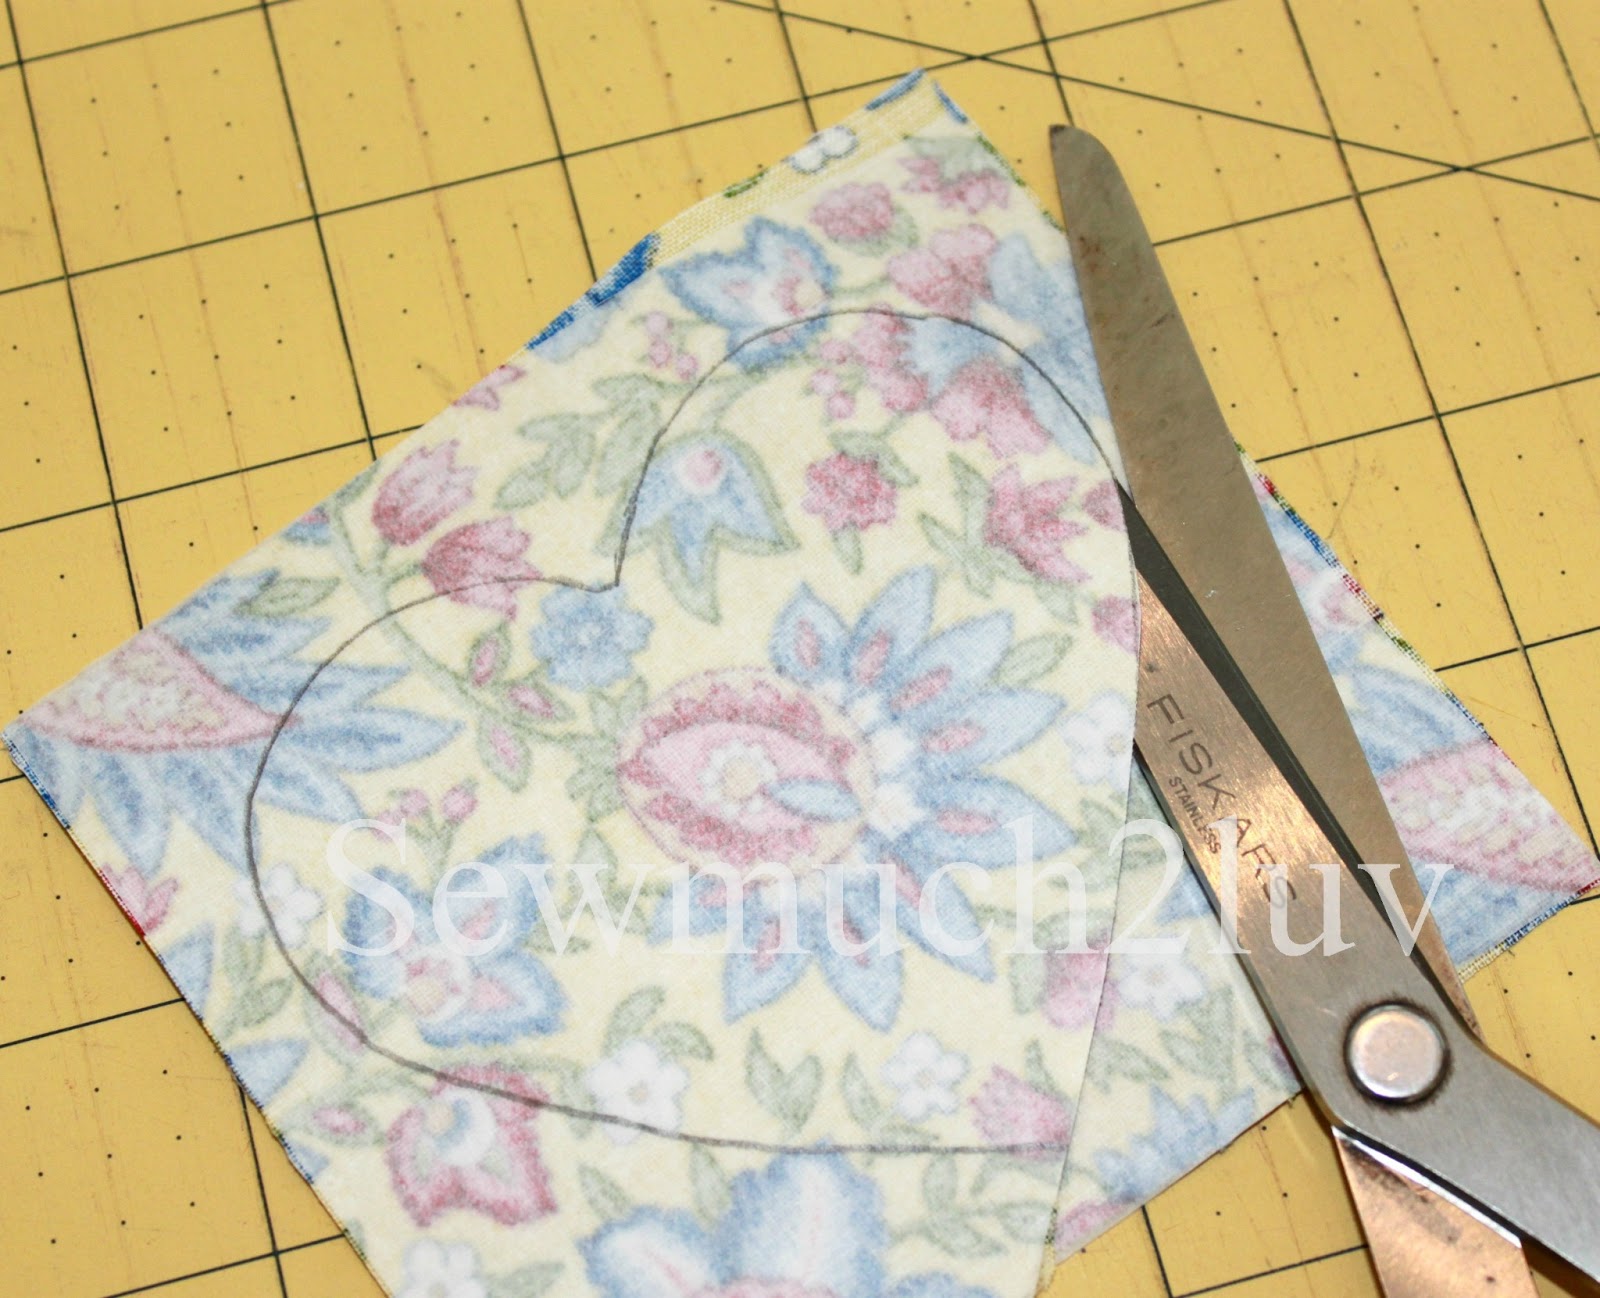
Take what ever shape you choose for your center.
I used a heart because I love them so :)
Fuse Wonder Under to the wrong side of scrap fabric.
Draw your shape onto Wonder Under
and cut it out.
I use a large pin to scrape a line gently
across the center of my applique.
This makes it easier to remove the Wonder Under
without distorting your cut fabric
by trying to peel it from the edge.

Just bend the fabric where the scratch is
and peel it off.
Easy Peasy :)

Position your applique in the center of your project
and press with your iron.
I used a blanket stitch with #8 Perle cotton floss
but you can use your machine stitching
or any other decorative stitching you like.
You could even go completely wild
and add some rick rack!!!
Now you're done :)
Admire your handiwork!

Awesome! I so need this tutorial !thanks
ReplyDeleteSew Much 2 Luv: "I Heart Cooking" Pan Dividers Tutorial >>>>> Download Now
Delete>>>>> Download Full
Sew Much 2 Luv: "I Heart Cooking" Pan Dividers Tutorial >>>>> Download LINK
>>>>> Download Now
Sew Much 2 Luv: "I Heart Cooking" Pan Dividers Tutorial >>>>> Download Full
>>>>> Download LINK wR
coolio..i need some of these
ReplyDeleteWhat a great idea! I've been using coffee filters and paper plates! Yours are much prettier!
ReplyDeleteThis is the best idea in a long time, many thanks!
ReplyDeleteGreat idea ... now if only I could train my kids to actually use them ... I love that red fabric though, it just makes me smile :)
ReplyDeleteI really like the idea and it sounds so easy to do with our tuto. Thanks. I used silicon cake mold so far, I think your fabrics one will be most welcome.-
ReplyDeleteGreat idea! Would work for our pans in the motor home. Would cut down on the rattling noise as we're tooling down the road.
ReplyDeleteWhat a marvelous idea! I'm still using paper towels like my folks did. Guess it's time to get busy and make some for my kitchen too. Thanks for sharing!
ReplyDeleteWhat a great idea and I just LOVE the fabric you used!!
ReplyDeleteWhat a great idea! I have enamel covered pans that I use old towels in between the pans. I also cut felt circles for my good dishes. I think I see a change coming in the future. Thanks.
ReplyDeleteWhat a great idea and so much cuter than cardboard :)
ReplyDeleteWhat a GREAT idea! I have a new set of expensive pots and pans still sitting on my dining room table because I hated to put them in the cabinet where they might get scratched. I need to make some of these! Yours are just beautiful! Love the fabrics you chose!
ReplyDeleteOh my goodness what an awesome idea & tutorial. I have been needing this tutorial for years. Thank you . Thank you for a chance to enter your giveaway. I am Tammy I am a SAHM of 2..daugher age 12 son who is disabled and is now home with me all day every day age 19. I love to sew quilt craft & create anything I can get my hands on. I grew up around my mom and grandmother who mad ecustom clothing for people and also did alterations.My earliest memories are of sitting in the floor with my brother and sisters playing in the scrap pile..We were given hand needles to learn to sew with until we probably about age 5 that is when we learned to sew on the machines.My sibling sand I would have contest who could make the best doll clothes and blankets. and yes I alwyas won then my brother came in second. My other 2 sisters were horriable at sewing.... And I have been sewing ever since then. conn_and_vans_mom(at)yahoo(dot)com
ReplyDeleteI think your pan dividers are great. I learn how to sew when I was in high school, then learned from my Godmother, I could remember the days just senting with her and sewing. I am from Wasington, D.C. and my name is Felicia.
ReplyDeleteHi, my name is Charlotte and I am from Alabama. My grandmother taught me how to sew and embroider and I was fortunate to have that. I loved your pan protectors.
ReplyDeleteGood Post
ReplyDeleteWhat a great idea. I use ugly pan dividers at present and you have inspired me to Pretty Up my pan drawer! Thanks
ReplyDeleteOh. My. GOODNESS!!! These are wonderful! I'll be making tons of these!
ReplyDeleteLove it! Here's a suggestion -- since you are appliqueing the heart over the middle, you can avoid leaving an opening to hand-stitch and just cut a slit under where the applique will go and turn through there. I do that on my jewelry pouch rounds. You can slip a bit of lightweight fusible interfacing under the slit after you've turned right-side out and close up the slit if you want.
ReplyDeleteWell aren't you a smart girl. Not only do they keep the pans from scratching but cute too!
ReplyDeleteBest Buy Geek Squad provides coverage for parts and labor required to get your product up and running again. See sample of current Geek Squad Protection Terms and Conditions for specific coverage and exclusions. Power surges can happen at any time, causing damage to your equipment. Most manufacturers’ warranties don’t cover power surges, but with Geek Squad Protection, you don’t have to worry. We can fix your mobile phone, laptop and PC, regardless of where you buy them and of which brand. Our Geek Squad Protection team likewise sets up, install, protect, and fixes everything from home appliances, smart wearable gadgets to phones.
ReplyDeleteYou know that you won't go wrong, and that your pans will last and be just as good in many years time. nonstick cookware
ReplyDeleteSew Much 2 Luv: "I Heart Cooking" Pan Dividers Tutorial >>>>> Download Now
ReplyDelete>>>>> Download Full
Sew Much 2 Luv: "I Heart Cooking" Pan Dividers Tutorial >>>>> Download LINK
>>>>> Download Now
Sew Much 2 Luv: "I Heart Cooking" Pan Dividers Tutorial >>>>> Download Full
>>>>> Download LINK